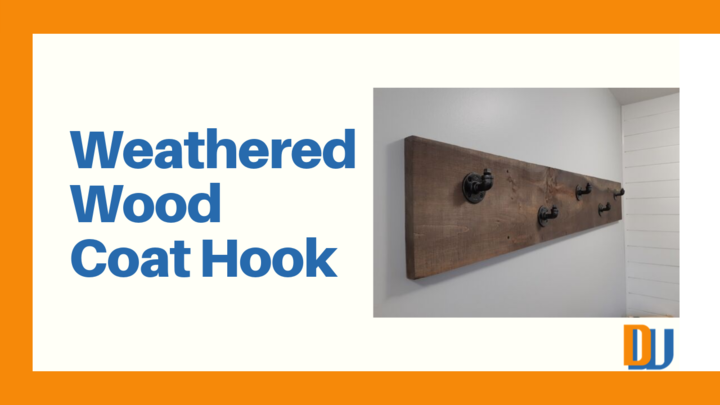
If you don't have time to wait 20, 30, or 50 years for your wood to look weathered and aged then you'll want to read this blog.
You can make your new wood look aged in minutes using this simple recipe.
Like most things, if their is a market for it there is a product out there that will do it for you. The only problem is that it will cost you more to buy it.
That is the same case for wood aging or weathering accelerator solutions.
You can buy it ready made off the shelf for a premium price or you can play around and create your own recipe.
That is exactly what many people are doing, making their own solutions with off the shelf ingredients.
Now similar to our DIY Chalk Paint blog sometimes buying the ready made is worth the price. Especially if you are only planning to do 1 or 2 little projects.
It may not be worth your time and effort trying to figure out which recipe or process works best for you.
We used ready made products when we renovated our laundry/mud room for the shelf and coat hooks.


That's where paying the premium for ready made comes in, the companies that make the products have already done all the testing and removed all of the guess work to some extent.
There's always going to be some surprises with the ready-made solutions as different woods will react differently to some extent.
There is no big secret on how to make a wood weathering accelerator.
All you do is take white vinegar and add some steel wool. The finer the steel wool the better.
There are no ratios or amounts to be concerned about as long as you make as much as you need for your project.
The key to perfecting your desired look is not by the amount of ingredients rather than the amount of time you leave the steel wool in the vinegar.
Stuff You Will Need To Make Your Weathered Wood Accelerator
Materials
- White Vinegar
- Steel Wool -The finest #0000 is ideal
Tools
- Paint Brush
- Mixing Jar or Bucket
- Stir Stick
- Sand Paper
Instructions
- Choose the amount of White Vinegar you think you will need for your project
- Poor the vinegar into a jar and add a bundle of steel wool
- Let the mixture sit for 24 to 72 hrs for desired effect. In my video I showed how it looks every half hour for 2 hrs and then 24 hrs after letting soak. The longer you leave the steel wool soak the darker red it will become.
- Once your mixture has reached the desired color you can apply it to your wood with a standard paint brush. Apply a generous amount and let the excess drip off or wipe off. Let dry for at least 30 to 60 minutes to have a good idea on what the finished color will be. You may apply a second thin coat to darken the tint.
Pros and Cons
Pros
- Cheap
- Easy to Make
- Easy to Apply
- Water Clean-up
- Off the Shelf Materials
Cons
- You need to prepare the solution ahead of time, 24 to 72 hrs ahead.
- The color outcome may differ from one mixture to the next depending on how much you dilute the mixture and how long you leave the steel wool in the vinegar
We hope that this will help you on some of your future projects and would love to hear if you have used any of the off the shelf ready made mixture or made your own. Leave a comment below, we love to hear form you.

I love this post. I usually work on a lot of at home projects with my father and I am sure he would love to make some weathered wood with me and we can turn it into all kinds of things.
The instructions and details in this post are super helpful and I love how there is even a video. Great job.
I will definitely make a return to the site.
It would be great if you can share your results with us. We would love to see them.
Thank you for this post!
I’ve wondered how to make wood looked weathered and, frankly, figured it was too difficult and that I should just buy what I need pre-weathered.
I didn’t realize how easy it was to do it. This post will save me a ton of money in the long-run I think.
Now I just need to setup a space and get the materials.
Thanks again,
Scott
It is really easy. We wanted to show in more detail how to make it but there are so many variables on how it can turn out we figured we would wait for future projects to give specific details for each at that time.
Hi Paul!
Thanks for this guide. I am finally refinishing my cabinet with your technique. So far So great!!!! One question. The said cabinet has 4 drawers over 4 doors. I have already painted applying up and down the boards. Do I apply paint up and down on the drawers as well or maybe across them? I don’t want them to look weird sitting right above these doors. Thank you.
Awesome! It’s always suggested to follow the grain and usually, the grain on drawers would be along its longest dimension, which is generally across, side to side. This weathered wood accelerator doesn’t go on the same way as paint or stain, it tends to just soak into the wood grain evenly no matter which direction but it’s always good to go in the same direction as the wood grain. Hope that helps and we would love to see the end result.
We are a do-it-yourself family here in upstate New York, and I’m so excited I have found your website. My aunt has a beautiful new house, and we were wanting to make her something for it. We always like handmade gifts so much better than store bought, so I’m so happy to find this article. These pieces are awesome, and we can literally make anything using these techniques. thank you so much.
We’re sure your aunt would love receiving a DIY gift made from wood that looks weathered and rustic. Pieces like that go well with any decor. We hope you will share pictures of the gift you’ll be making. We would love to see the end result.