Outdoor Loveseat
Creating outdoor furniture with reclaimed wood is not only a green alternative to buying new mass produced plastic patio furniture but it will be original and look amazing!
This project started out when we were tearing down our old deck and wondered how we were going to dispose of all the old wood that we had piled up in our backyard.
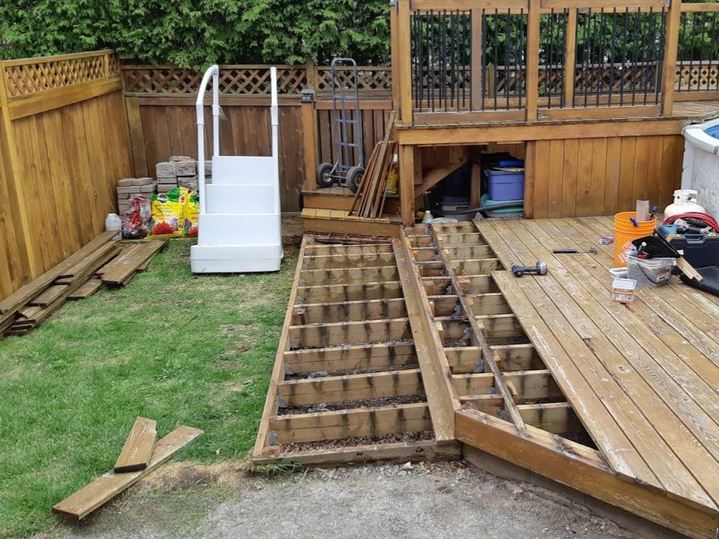
Prior to moving to this home in the suburbs we lived in the country where it was a little easier to dispose of old wood on the property either by letting it pile up in the back 40 then allowing it to rot into compost or we would use it as firewood for our bonfires on the weekends.
Those were no longer options for us in our small backyard where the yards are so small.
Our yards are so small, that if we listen hard enough we can hear our neighbors think.
Once we completely demolished our old deck we built a new deck in a different part of the backyard.
The new deck looked empty so we thought about buying some new furniture.
We went out shopping to the nearby big box stores ready to burn a small hole in our wallets only to be disappointed with the style and quality of furniture available.
We found the furniture the big box stores had available were priced way too high for the quality they were offering.
We would sit in them only to feel the seat under us creek and sway as though they were ready to fall apart in the store.
That's when we had the idea of using the old deck lumber to build our patio furniture.
We found the perfect cushions in one of the stores so we bought them on the spot and drove home to start designing our reclaimed wood patio furniture.
Now that we had the cushions we were able to figure out the dimensions for our patio loveseat.
Designing
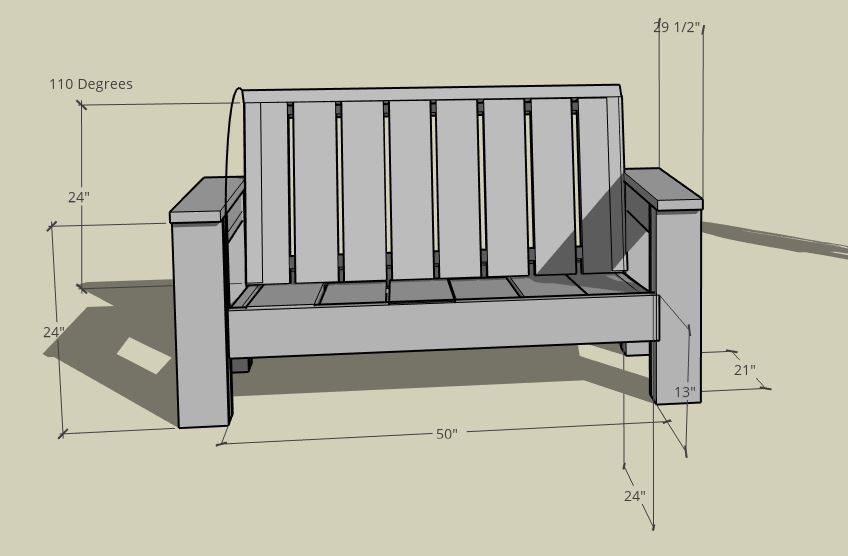
We started by designing it in Sketchup so that we can view an awesome 3D model before building and to have an idea what amount of boards we will need to build the loveseat.
Plan in hand we brought in the reclaimed deck boards we needed into the garage. We started with building the four legs as this required most of the cutting, drilling and gluing.
Building The Components
The legs now complete, we started cutting all of the seating and backing boards. It was easy cutting as most of the boards were 24" long with the cross members being 50".
See full material list and dimensions at the bottom of this blog.
The trickiest part was figuring out the angle for the seat and backing. Using the garage floor we figured out an angle we felt would be comfortable knowing the size and type of cushions we bought.
Assembling The Outdoor Loveseat
With all of the boards cut and legs assembled we started assembling the loveseat.
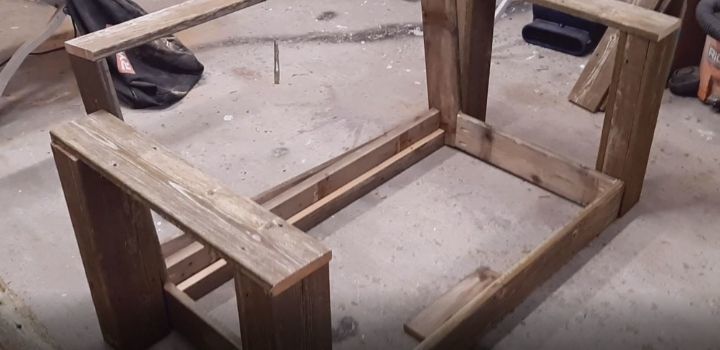
The assembly of the whole loveseat was rather easy, it basically took the same amount of time to assemble the whole loveseat as it took us to build the legs.
It was finally all assembled.
Finishing and Sealing.
We started by sanding the whole loveseat with 60 grit, then 80 and finished with 120 grit. This being an outdoor piece we didn't feel it needed any further sanding than the 120.
The sealant we used was Spar Urethane and the technique we learned from a Youtube video by Izzy Swan.
The first coat we used equal parts thinner, in this case mineral spirits and the Spar Urethane.
This helps to get the Spar Urethane to soak deep into the wood instead of just lying on the surface.
The second coat we increased the concentration of the Spar Urethane to about 80%, then the third and fourth coat full strength.
This method of sealing the furniture makes for a really durable finish.
We used a satin Urethane as we didn't want it to end up looking like a glass finish with all those coats of finish.
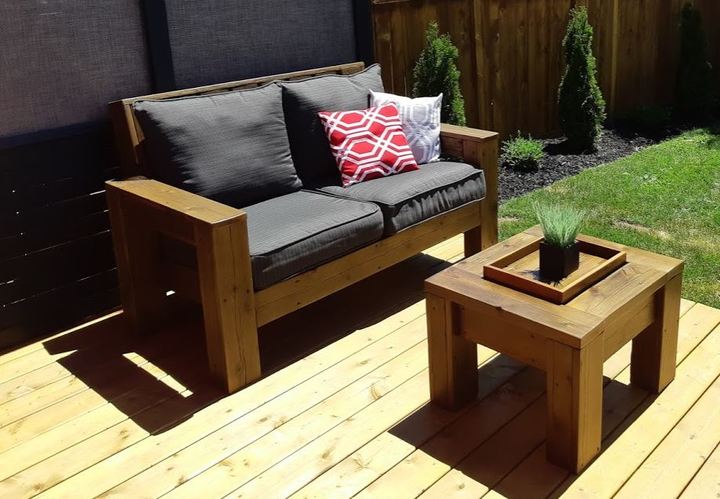
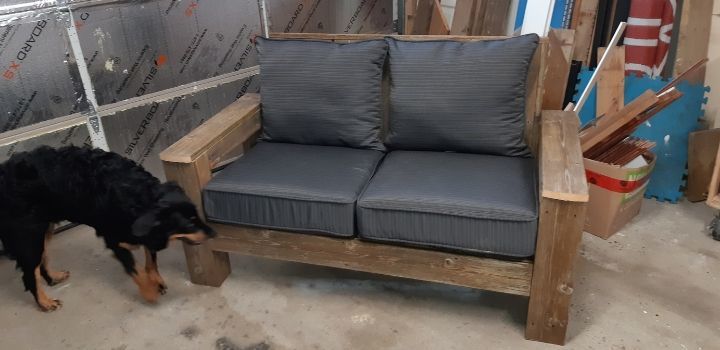
The loveseat is now complete and cushions are added.
Time to sit back and enjoy the back yard with our new loveseat made from the reclaimed wood from our old deck.
What's Next...
Now it was time to build a coffee table that you may have noticed in the image with the completed set.
We created a coffee table with a little twist.
Check out this coffee table built with reclaimed wood here to get the full detailed plan and steps we took to build.

Wow, amazing resources about outdoor furniture. We were thinking to buy a coffee table and outdoor furniture. But the price was so high that we stopped buying and still using the old one. But after reading this article, I got an idea. Why we buy then if we could make! You show everything so clear I think anyone can try to make their outdoor furniture, especially I love the 3D part. I just showed my husband and ask can he make by seeing your instructions? He said it is a perfect guide. Thanks a lot for this great resource.
Awesome to hear. I’m still learning how to fully use Sketchup but I am confident that the plans will improve quickly. Brenda and I really enjoy doing these projects and is so much more rewarding when seeing that others can get inspiration to build their own furniture.
Regards,
Paul
Wow.. the finished loveseat looks absolutely amazing. It certainly looks much better and unique than anything I can find in the stores.
Now, that has given me a lot of inspiration to try working on some sfurniture with used material, although it will look nowhere as good as yours!
I checked out your post about the coffee table too and I love how it has an ice bucket in it. You guys are really amazing!
Thanks, Joe,
It really is worth using reclaimed wood to create these unique and functional pieces of outdoor furniture.
Please send us pictures of your creations should you decide to build your own.
Paul
This is a great and innovative way to protect the environment. By using reclaimed wood, the need to cut threes and forests down will reduce drastically. I think that this article is very educative and more people need to read it. The way that was explained it looks so easy to create patio furniture.
That is one of our main goals for this website but believe it or not it’s actually difficult to find waste wood for projects. There seems to be a stigma of people not wanting to give their waste to strangers. We will be talking about that issue in future posts, stay tuned.
Paul
Excellent article on Reclaimed outdoor furniture, your post is amazing and exciting, I gently read through and I grabbed the knowledge of constructing outdoor furniture. The process is never ambiguous, the woods that could have been wasted was converted to useful furniture. It’s innovative and I give kudos to your writing and teaching prowess. I enjoyed your guide on constructing outside furniture,thank you for sharing this innovative post.
Thank you for your motivating feedback.
Paul
Wow, this looks great. I am currently working on re-staining my windows and then moving over to my balcony. It’s large enough for something like this. But I have a question. It may be a bit elementary, but my experience with carpentry is still rudimentary. When sanding the wood, do I need a sander? Or can I get away with just using the correct sand paper and my arm? Would the finish be okay with hand-sanding?
You can sand the wood by hand but there are some variables that will determine how much work it would take to do it by hand. The variables to consider would include what type of wood you are using, how weathered or beaten up it is, and if it was previously stained or painted.
If the wood was never stained and only weathered for 2-5 years then sanding can certainly be by hand to remove any loose pieces or wood fibers while maintaining the weathered look.
Now if your wood was stained or painted and you want to see the original wood underneath then the hand sanding, although possible would take a considerable amount of time and effort. In that case, a powered sander would be recommended, my go-to type of sander is a random orbital sander.
Paul
This is such a lovely piece of furniture!
I always enjoy watching those DIY videos, thanks for including one in the post. It’s amazing how you can turn something old and seemingly useless into a totally different thing. The loveseat looks amazing in the picture together with the little coffee table.
Also thanks for always choosing reclaimed materials for your projects, it’s such a great idea to start utilising and recycling old materials.
Working with reclaimed materials can be a little more challenging but so much more rewarding in the end, Thanks for your feedback and support.
Cheers
Paul
Hi Paul. Love this project! I don’t see the cut sheet or materials list- cab you point me in the right direction? I would love to build this loveseat for my wife. Thanks!
Hello Ryan, sorry to say we never created a cut list or material list for this project. It was one of our first projects with reclaimed wood and never got around to making one. I will try to make one in the next few days and notify you here once completed. Thank you for visiting and for your patience. Cheers Paul and Brenda