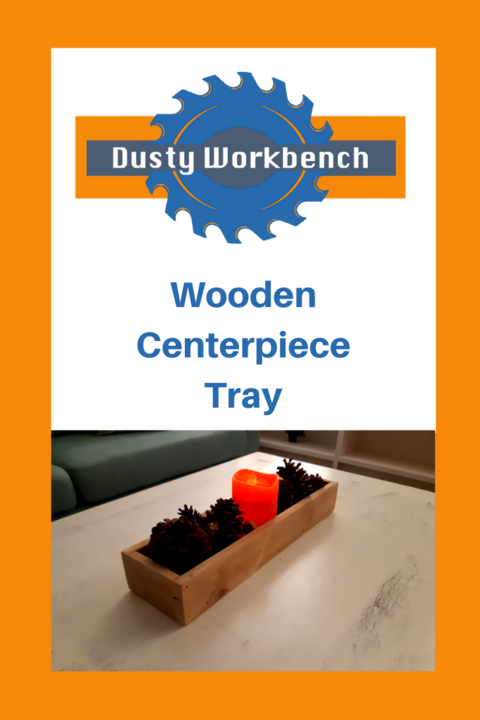
This is the perfect centerpiece box for your table to add your personal accent to any room.
The design of this box is basic to allow your own imagination to come through with decorations of your choice.
The large opening can accommodate candles or decorations of various types.
We used reclaimed cedar boards to make these but you could use any wood type depending on your own taste or wood availability.
You can also finish it with hundreds of different types of finishes to personalize the final product.
Share Me On Pinterest!
If you are planning to make this your next DYI project it would be considered to be on the easy-end of the scale.
Not a DYIer? Then click here to contact us and we will build you one or two, three...
Keep reading if you would like to see instructions, supply lists, cut lists, and tools required to build your own.
The dimensions provided are only a guide as you can make yours pretty much any size you want to fit your table.
For example purposes, we will describe the dimensions we used if you would like to have the exact same look.
Check out the video below to have an idea how we built it then further down we have instructions and lists.
How We Built It
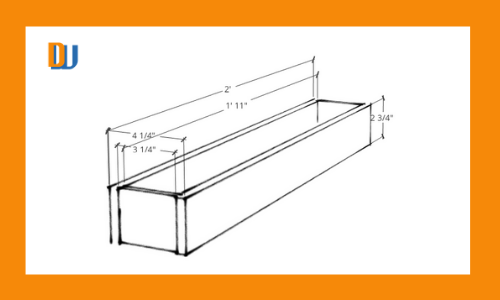
Design and Dimensions
Preparation
Shopping List
- 1 - 1/2" x 6" x 72" Cedar Fence Board -or any kind of wood you have available
Note: Lumber size listed here is in actual size. Learn more about Nominal vs. Actual sizes here.
Materials
- Cedar Wood or any kind of wood you have available
- Nails or brad nails
- Wood Glue
- Sand Paper
- Linseed Oil or any Wood Finish of your choice
Tools
Must Have Tools
- Safety Glasses
- Ear Protection
- Dust Mask
- Sandpaper
- Tape Measure
- Square
- Circular Saw
- Paint Brush
Advanced Tools
- Compound/Miter Saw
- Table Saw
- Orbital Sander
- HVLP Paint Sprayer
- Joiner
- Planer
Cut List
- Long Sides
- 2 - 1/2" x 2 3/4" x 24"
- Short Sides
- 2 - 1/2" x 2 3/4" x 3 1/4"
- Bottom
- 1 - 1/2" x 3 1/4" x 23"
Steps To Building This Wood Box Centerpiece
We start by doing a design in SketchUp.

Then we gather the wood required to build our project.
In this case, we find a few boards reclaimed from an old cedar deck.
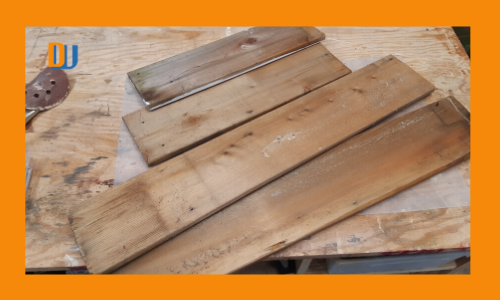
Now it's time to cut that wood down to the dimensions needed to make our box.
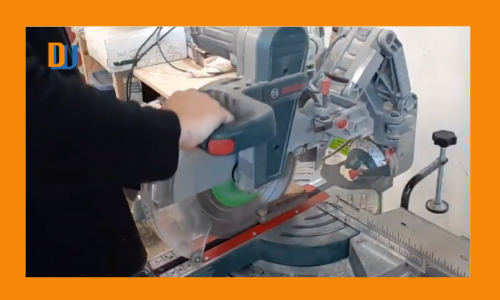
The wood is all cut to size it's time to start sanding. Did I mention sanding and more sanding?
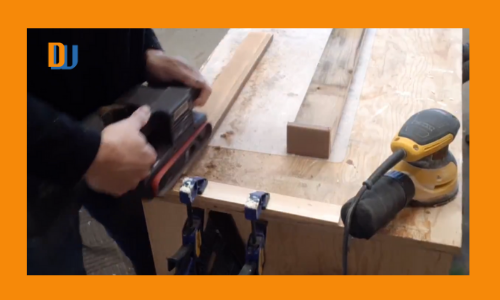
The next step is always my favorite step, assembly!
This project only requires light assembly work by using a little glue on all the joints and held together with brad nails until the glue dries.
If you don't want to see the nail holes you can use some dowels and glue but we like the nail hole look and it does make building much faster.

Once completed we do a little more touch up with some hand sanding then the box is ready for its finish of choice.
One of our most popular finishes is using Linseed Oil but we will probably try different stains and colors for these boxes.

Here is an image of one of the smaller centerpiece tray with some holiday decorations. This box is still in its raw form. In other words, we haven't decided what type of finish we will be applying.
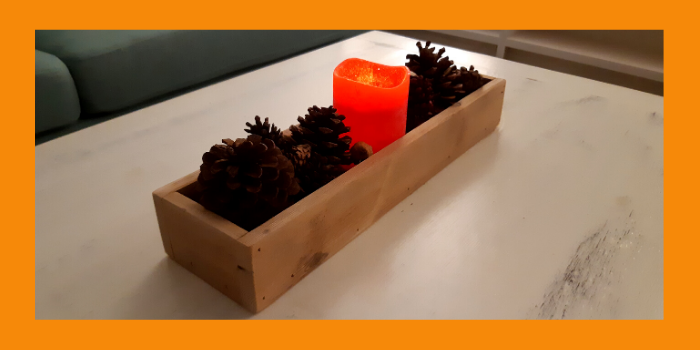
We hope you enjoyed this short description of an easy project you can do before your holiday events.
This centerpiece can be used year-round for any event or just to showcase as a home decoration.
Let us know if you plan to make your own centerpiece tray and share photos of your project with us.
We would love to see them. If you have any questions or comments please write them down in the comment section below.

My wife and I were just talking about something to put on the coffee table to spruce it up a little, this is an excellent idea! Although I am definitely not the do it yourself kind of guy so I think I will take you up on your offer and have one built. There are so many different things that we can do, I can’t wait to get started! Thank you for sharing!
We will be adding some more photos on our website once we put the finishes on the wood centerpiece. We are planning to sell these at an upcoming craft sale and if they sell well we may be looking at selling them online so keep in touch and be one of the first to get one 😉
I am far from a person that can build things. I mess up on everything lol. But I can say that I like the way you laid out step by step what a person needs to build it and steps on how to build it. If I was to purchase this just might be one of the first things I built without totally jacking it up.
Hahaha, we all have to start somewhere and this project would be a good one to start building those woodworking skills.
Hello Paul, it’s nice learning something new about woodwork. I don’t usually have time to make some really nice stuff on my own, but it’s always been a pleasure trying it with kids who are always anxious to visit the storeroom to get something they can work on. A wood box of such nature is a wonderful idea and it makes sense that it is something really simple and easy to make on your own.
This would be a great project to create with your kids. We used power tools but it can be done with handtools just as easily. All that would be needed is a handsaw, hammer, small nails, and sandpaper.
Hello,
What a beautiful description of how to make a wooden centerpiece tray! I like to DYI, usually using Pinterest for new ideas, but your detailed post impressed me a lot. The wooden centerpiece tray will be my new project next week. Also, you gave me a piece of good advice – Linseed Oil for the finish. ( I never used Linseed oil). I believe I will enjoy making a wooden tray!
Where should I buy Linseed Oil?
Thanks again. I really enjoy reading your post.
We love using Linseed oil as a finish. It goes on easily and it enhances the wood color. We bought our Linseed oil at our local big box store but you can certainly find it in most hardware stores or online at Amazon
Wow? What a great post, I really had a good flow of information as I was going through the article, and have moved into my new home a few weeks ago I think this wood box centerpiece would look great. I like it more various decorations. I will have to subscribe to your newsfeed to learn more about this and other related articles so as to come up with great ideas. I appreciate you sharing the process of making one for myself wit all the requirements and the procedures that was a wow! I really appreciate that and soon I will be working on that.
Thank you.
That’s awesome to hear! This is certainly one of the easiest projects we have built so far yet it has a nice rustic charm to it that can blend in well with any decor.
I think you picked the perfect name for your website. It sounds both cute and rugged. To your article, the box is super practical; the one pictured with pinecones on your table is great. I do have a few little questions. Why linseed oil? Does it have a superior imperviousness to the elements and bugs? For a more rustic look, would the box be just as sturdy if only the inside was sanded? If you did it that way, would you still finish the outside with linseed oil? Thank you for this handy little idea!
Awesome questions! We like the linseed oil as it is natural and it brings out the color and deep grain of the wood. It’s easy to apply and for something like this project will last for many, many years. We could have left the outer side natural but seeing that this wood was from an old deck it did have some areas that had some wood stain applied and was peeling in some areas. If it were natural Barnwood boards then we probably would have left it natural and seal it with a wax or shellac for a natural finish that won’t change the look of the rustic or aged wood.
What an awesome first project for a newbie. I love the idea of this. How much do you charge for one? I love the look of this. I live in Colorado and this would fit right in. It also looks like a pretty easy project. I don’t have much for tools but I see it doesn’t take too many for this.
It is an easy project that can be built with simple hand tools such as a hammer and handsaw. The price varies depending on the size and type of finish. We will be charging from $20 to $45. Some will be finished with a clear coat and others will have something like chalk paint.
Hey guys
I have many a dresser drawer in my house that are different from each other, whilst watching the DIY videos, it crossed my mind to paint all the dresser drawers in chalk paint, with the amount need a white pail of latex paint would be way enough, but what if I wanted to have different colored chalk paint? Would it be easy to add color to the white chalk paint say blue or black? Would adding concentrate color to the paint change the mixture of the end product?
A pleasurable site to learn new ideas, thank you 🙂
Homemade chalk paint is great and economical. So far we’ve only tried using the Plaster of Paris mixture and are looking forward to trying a project using Calcium Carbonate mixture that is supposed to yield much better results.
You can add color to your paint but would recommend that the color be added to the paint before adding the water and Plaster of Paris. The concentrated color additive won’t be an issue if it thins the paint it only means you won’t need to use as much water to get the desired consistency.
We hope that helps but keep in touch so you get to see an upcoming project using the Calcium Carbonate chalk paint recipe.
Hi Paul. Thank you for sharing this tutorial on how to make a wooden centerpiece tray. It looks beautiful, simple and clean for the table. This one is not very difficult to prepare as I am a do it yourself (DIY) lover. I believe anyone can do it if he or she follows the procedure in this post and even watch the video.
We are working hard to improve our DIY step-by-step instructions. We are excited to see people appreciate the work we put into them. We will keep growing our website with new and exciting projects.
This is really cool. I have never thought of this before even though it doesn’t look complicated. My dad sells roofing wood and most times I usually make some little projects like this to get some little bucks. This centerpiece is creative. It looks fancy on the table. Nice Job Paul.
.Good Vibes!
You’re lucky to have access to some good wood fro small projects like this. It would be awesome if you can share some pics should you decide to try this project out.
Cheers
Paul